Image Resizer
Resize by dimensions or percentage, with aspect-ratio lock, in your browser.
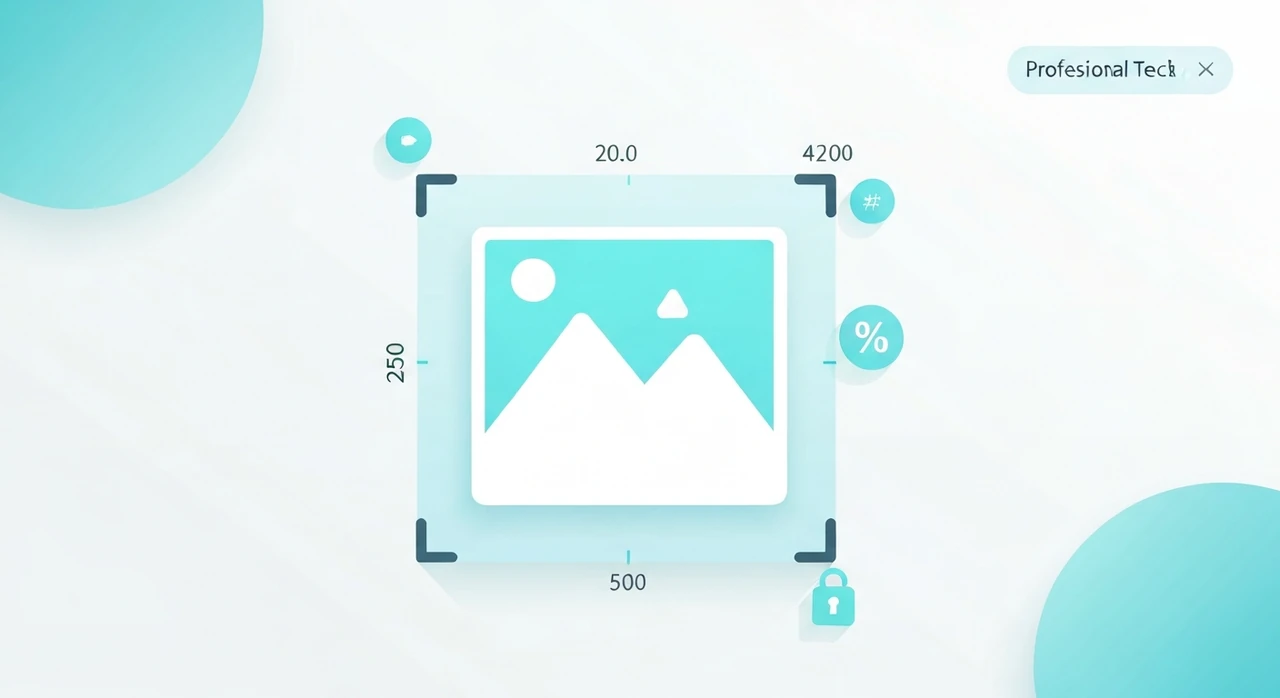
How to resize images
- Drop your JPG, PNG, or WebP files into the upload box, or click to select.
- Choose how you want to resize: by explicit pixel Dimensions or by Percentage of the original.
- Set the values. With aspect-ratio lock on (default), changing one dimension auto-computes the other.
- Pick the output format. Default is “Same as source” so PNG inputs stay PNG, JPG stays JPG, WebP stays WebP.
- Click Resize and download the results.
Everything happens in your browser. Files never leave your device.
When to resize
Most images on the modern web are larger than they need to be. Common reasons to resize:
- Reducing page weight for a website. Shipping a 4000-pixel hero when the display is 1200 pixels is wasteful.
- Fitting a platform’s requirements (social-media thumbnails, job-application upload limits, CMS maximums).
- Preparing for email where file-size caps force smaller images.
- Thumbnailing a folder of photos before archiving or sharing.
Resizing down is nearly always a good idea when the source is bigger than the intended display. Resizing up (interpolating to larger dimensions) never adds detail — it just makes the file bigger while softening the image.
Aspect-ratio lock
By default, the aspect-ratio lock is on. When you type a new width, the height auto-updates to preserve the original proportions (and vice versa). This is the right default for most cases.
Turn the lock off only when you intentionally want to stretch or squeeze the image — for example, matching a strict 16:9 crop where you’ve already cropped the source separately.
Dimensions mode vs Percentage mode
Dimensions mode is for when you know the target pixel size: “I need this to be 1200×800.”
Percentage mode is for when you want to scale a whole batch: “Shrink all of these to 50% of their original size.”
Percentage mode is especially useful for batch-resizing a folder of photos at once, since each photo’s absolute dimensions may differ but the relative scaling is the same.
Output format
The tool supports JPG, PNG, and WebP as output formats.
- Same as source (default): A JPG input produces a JPG output, PNG produces PNG, WebP produces WebP.
- JPG: useful for photographic content. Smaller files; flattens any transparency to white.
- PNG: useful when you need transparency or lossless preservation.
- WebP: the modern web default. Smaller than JPG or PNG at equivalent quality.
If you want to both resize and convert formats, this tool handles both in one pass.
What about quality?
Resize operations are inherently lossy — downscaling requires combining neighboring pixels. The tool uses the browser’s high-quality resampling (typically bilinear or bicubic depending on the browser).
For the encoding step:
- JPG output uses quality 90 (close to visually lossless).
- WebP output uses quality 90.
- PNG output is always lossless.
If you want to further compress the resized output, run the result through our JPG compressor or PNG-to-WebP converter.
Upscaling vs downscaling
Downscaling (target size < source) is safe. The tool combines pixel values intelligently and produces clean, smaller images.
Upscaling (target size > source) does not recover detail that wasn’t there. The algorithm interpolates between existing pixels, which smooths the image but can’t invent features. If you need true upscaling that adds detail, you’d need a machine-learning-based tool like Topaz Gigapixel or ESRGAN. Our browser-based resizer is best for down-scaling and modest up-scales only.
Metadata
The re-encoding strips EXIF, GPS, and other metadata. This is usually what you want for privacy. If you need
to preserve metadata, use a desktop tool like ImageMagick (magick input.jpg -resize 50% -strip=none output.jpg) instead.
For explicit metadata stripping that keeps the original dimensions, see our EXIF stripper.
Common mistakes
- Up-scaling and expecting sharper results. You won’t get them without ML-based tools.
- Not specifying a width or height and getting unexpected output. If both dimension fields are blank, the tool keeps the original dimensions.
- Resizing without checking aspect ratio lock. If you need to keep proportions, make sure the lock checkbox is on.
- Forgetting that the output has no metadata. If the original had color profile information (Display P3, for example), you may see a subtle color shift in the resized file.